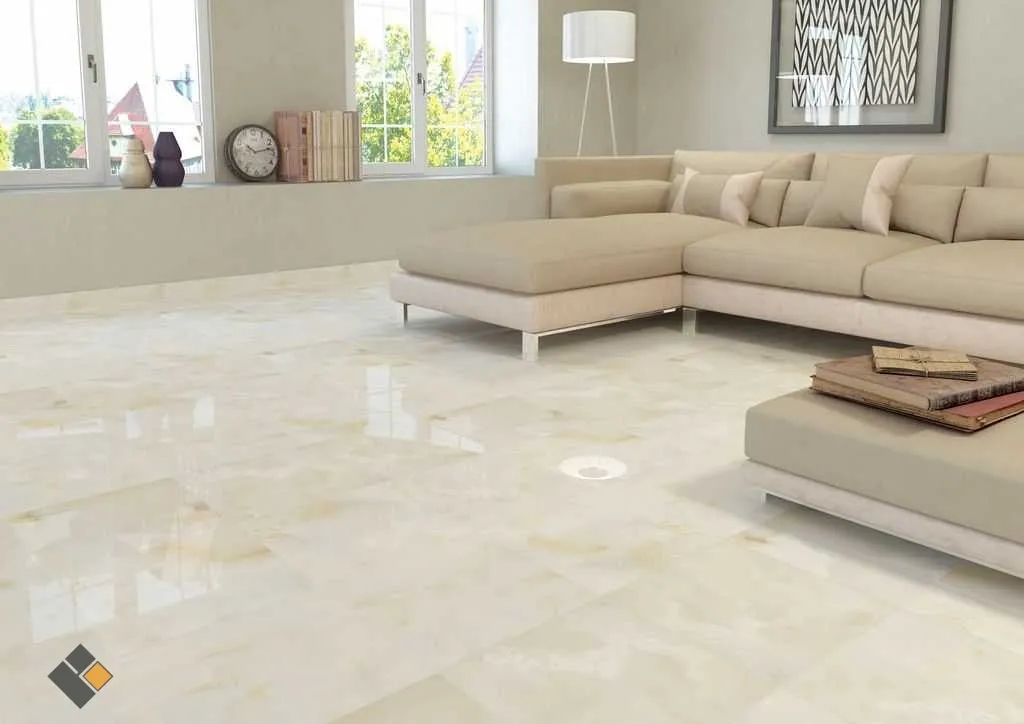
A new ceramic tile installation can infuse a facelift. Beautiful and sturdy flooring ceramic tiles are commonly used, but can also be used on a countertop wall or countertop (such as a kitchen backsplash). The result of a tile installation is a visually appealing coverage and message that you can keep from many.
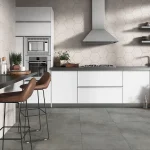
The most common areas where ceramic tiles are traditionally used are in the kitchen, bathroom and seventh floor in the Middle East. Polished ceramic or porcelain tile provides a water resistance that helps reduce the chances of growth in the area where it is rolled. Ceramic is a great alternative to rugs and types of materials that can be harmful to allergy sufferers.
Their prices range from very affordable to more expensive depending on tile size, thickness, design and finish.
Ceramic floor installation
Installing ceramic floors is one of the most notable home improvement projects undertaken by homeowners. Do-it-yourself installation can save significant installation costs compared to hiring a professional while the task itself can be accomplished in a relatively small amount of time. Everything it takes to complete a professional looking ceramic floor tile installation with extreme detail.
The most important thing when considering floor tiles is the size and thickness of the necessary tiles. Choosing the right tile will ensure that it can last as long as possible. Flooring usually uses larger and thicker tiles in order to be able to withstand heavy traffic and carry loads.
Other ceramic tile combinations
Many other ceramic tile installations can use almost any type of tile. The tiles used to cover the walls can be very small and thin because the bearing properties of the tiles are not important in this regard. This is true for ceramic tile backsplashes as well as tiles used to lining bathroom or shower walls.
The different sizes, textures, and colors of ceramic tiles allow homeowners to get creative when it comes to finding new applications for their use.
Whether you’re trying to install ceramic tile yourself or trust a professional, adding ceramic tile will go a long way toward increasing home enjoyment and resale value.
Most of the cuts you will make while installing ceramic tile will be simple straight across the cut. However, there are also a few more complex cuts, such as L-shaped, circle, and U-shaped cuts. The topic of this post is making L-shaped cuts in ceramic tiles. L-shaped wounds occur at the entrances and at the outer corners.
The simplest way is to select tiles by overlapping them with two adjacent tiles.
Lay the tiles on top of one of the adjacent squares so that they are touching the wall. Then align the edges with the grout lines. In the image below, there was enough overlap on the adjacent tile that I just tuned the edges of the piece I was marking with the adjacent tile underneath. Next, I marked the tiles in the corner of the wall. I didn’t exactly paint my mark at the corner, but I did leave some wiggle room in case the wall curves.
- Lay the tiles on top of the other adjacent tiles so that they are touching the wall. This time I used spacers to make sure the tiles line up with the grout line, making an L shaped cut through the overlap and marking
- Use the building speed square to draw lines for the pieces.
- Cut tiles along the lines. Make sure not to cut the intersection of the lines.
- L-shaped cut.
- Dry the tiles before applying them with mortar or adhesive. If you have to re-cut it, it will be easier when the back is not covered in mortar.
- Lay the tiles with mortar when you know it will fit.
Flooring plays an important role in the look and feel of any room or space, be it a kitchen, bathroom, gym or playground. Being one of the biggest elements one notices upon entering the area, the floor creates an instant effect. Therefore, it is imperative that you choose functional and aesthetically pleasing flooring. It is also important to take care of the flooring to get the most out of it.
For commercial flooring installations , rubber flooring is a great choice: it’s strong enough to withstand the maximum penalty, but it’s colorful, durable, warm, and beautiful. It comes in a variety of textures, from silky smooth to durable and has unmatched anti-slip properties. It absorbs impact and sound more effectively than any other surface such as vinyl or linoleum floors.
One of the most popular types of rubber flooring options is interlocking rubber tile flooring due to its versatility and wide range of functions. The interlocking rubber tiles are shock absorbent and durable, making them ideal for gyms and commercial stadiums. Rubber tiles can also be used around ice rinks, as they have excellent drainage ability.
Installing interlocking rubber tiles is also not very difficult and can be handled by any DIY enthusiast provided they can manage the weight of a single rubber tile. In this article, we will discuss how to install interlocking rubber tiles in 12 easy steps.
Tools and materials required :
- Interlocking tiles – You can contact a rubber flooring expert who can help you with the right amount for your area.
- plastic connector pins
- rubber mallet
- multi-use knife
- straight edge (eg, ruler, carpenter’s square)
- chalk
Preparation :
All types of surfaces such as concrete, asphalt, wood and compacted dirt are acceptable for rubber tiles. You just need to make sure that the subfloor is structurally sound and relatively level.
It is best to use a vacuum cleaner to clean the subfloor of any dust, dirt, or other debris. If a vacuum cleaner is not available, simply use the broom and remove all foreign matter as much as possible.
Next run a damp mop over the area to remove any oils, grease, and materials that could be obstructing the installation. Allow the floor to dry completely before installing the tiles.
Remove all packaging from interlocking rubber floor tiles, and place them on a clean floor surface 24 hours prior to installation. This will allow the tile to adapt to the conditions surrounding the area, including the temperature and humidity level. This ensures smooth installation and consistent end result.
For some people, the strong smell of new rubber tiles can be annoying. To reduce the smell, wipe the tiles with a damp cloth and air them by placing them in an open area for a few hours.
Install :
After proper preparation of the installation site and rubber tile, follow the steps listed below to properly install the rubber flooring in no time!
- First you need to insert the plastic connector pins into the pre-drilled holes on two adjacent sides of each tile. One trick to save time is to stack the rubber tiles in piles of five to ten pieces and then insert connector pins into the holes of the adjacent sides while the tiles are in the pile.
- Lay one of the tiles in the corner of the area you intend to cover. Make sure that the plastic connector pins you inserted into the tile point are along the boundary of the area.
- Take a second tile and align its pre-drilled holes with the connector pins of the first tile. If the room you’re working in is an enclosure, you can lay the tiles near the enclosure and let them act as a guide. This way the screws and plastic slots will align naturally.
- Carefully guide the second tile toward the first tile, letting the nails into the hole. Use your hands to push the tiles together as far as you can. After you feel the resistance, you can use a rubber mallet to gently tap the tiles together to remove any gaps. Make sure you don’t hit the tiles too hard or you may damage the tiles.
- Using the same method, lay the tiles in a straight row until you reach the opposite end of the can. Then move on to the next rows until the entire area is covered. If all the tiles fit perfectly on the tray you’re working on, just relax and skip to step 12. However, if you need to cut tiles to fit the remaining space of the row, continue to the next step.
- Before cutting the tiles, the remaining floor length should be measured using a suitable tape measure. Don’t rely on guesswork.
- Turn the tiles you want to trim upside down and mark them with chalk to the exact measurement you took earlier.
- Draw a straight line on the tile as a guide.
- Using a utility knife to cut the rubber tiles along the chalk line. You may have to turn the knife several times to create a slashing line. If it becomes difficult, you may want to grease the knife with a solution of soapy water before slicing.
- Next, hold the rubber tile near the score line and tear off the unwanted piece.
- To finish, pass the knife over the score line. Lay the cut tiles on the exposed areas.
- Here you are! Your new rubber flooring is ready!
ceiling tiles
What comes to mind when you hear that? Stunning views of the Greek coast, serene Tuscan villas overlooking gentle hills, French castles at the foot of the Pyrenees, Spanish farms on the Iberian Peninsula, sunny Mexican resorts, Scottish villages shrouded in mist or perhaps Chinese towns so old that time seems to stop? The common denominator of all these wonderful regions, from China and Europe to Central and South America is that they know the qualities of ceiling tiles.
So why do you see so few tiles in the US?
I think it is fear. Architects and designers fear the additional design and requirements for structural supporting roof tiles. Roofing contractors fear that their roof tile needs may be overestimated or underestimated and the technical ingenuity in installing them properly. All of these concerns can cause architects, designers, and contractors to charge a little more to work with roof tiles. This brings us to the builder’s fear. Tile account.
Are roof tiles more expensive to use than the most common roofing product used in the United States, asphalt shingles? Yes, the initial cost is more expensive, but be encouraged because the tiles’ more compensated qualities eliminate these additional expenses fairly quickly.
The first quality of ceiling tiles that begins to make up for its reckoning is its energy efficiency. The tiles are commonly installed on a so-called “floating system”. Each tile is fixed to a strip of wood or other material that lifts the ceiling tiles off the surface of the roof.
This means that the tiles do not come into contact with the roof surface at all, and this has created additional airspace between the tiles and the roof. The airspace insulates the surface of the roof and thus the interior of the structure from 55% to 75% of the heat radiated from the sun.
This same effect is what makes double pane windows so effective and it also keeps our coffee nice and hot in our thermos mugs. An interesting experiment to find out is to put your next cup of coffee in a regular mug. Coffee simulates the sun’s heat radiation and glass is directly simulated on the surface of asphalt shingles.
Since the glass is in direct contact with the coffee’s radiant heat, the heat comes directly through the glass, oh! Now pour the coffee into a luxurious thermos cup, plucked and viola, without a burning hand. Just like the airspace in a thermos cup keeps coffee’s radiant heat from burning your hand, the airspace beneath ceramic tiles prevents the sun’s radiant heat from heating up your home.
A cooler interior means less HVAC work and that means you save money on energy. Just like the airspace in a thermos cup keeps the coffee’s radiant heat from burning your hand, the airspace under the tiles prevents the sun’s radiant heat from heating up your home. A cooler interior means less HVAC work and that means you save money on energy.
The next quality of ceiling tiles that makes up for its reckoning is its durability. The tiles are very durable. Water does not penetrate it. Winds have a hard time damaging them as some roof tiles are rated at 150 mph or more. Freezing temperatures do not affect him. The tiles do not burn. Most hailstones shatter on the surface of ceiling tiles. All this together can mean significant savings in insurance premiums.
Take a look at photos online of wildfires that have destroyed homes in Texas, California, and other western states. You can often find a house or two in the middle of an existing fire disaster area. Usually it has ceramic tiles. Areas affected by significant hail that are primarily asphalt shingle roof structures will have to be replaced, at the homeowner’s and insurance companies’ expense, except for those few homes with roof tiles.
They usually only have superficial damage. There are tiles made today of Class 3 and Class 4 hail resistant. Insurance companies will deduct premiums for the use of cold- and fire-resistant roof tiles. More money saved each month on insurance means you have more for better things.
Another quality of ceiling tiles that makes up for its expense is its longevity.
The tile continues, plain and simple. There is a house/pub in England that was built in 1260 and still has the original tiled roof. The Sistine Chapel has had the same tiled roof for 300 years. The tiles will outlast the structure they are on. Both the above structures were reconstructed to one degree or another in that time period but in each case the tiled roof was reused.
Tile has the lowest life cycle cost of any roofing material made today. Common asphalt shingle, any roofing contractor will tell you, will have to be replaced about every 10 years. This means that it is a temporary roof cover, not a roof. This also means that the initial savings of using asphalt shingles in place of tiles are also temporary. What you save today, you will pay back in 10 years and then again in 10 years. Makes more since buying a real roof once right?
There are of course other qualities of ceiling tiles that should be mentioned. An array of colors to choose from, different profiles to choose from and many design options are all great qualities of tiles. Ceiling tile manufacturers today offer all of these things and more but the real quality that people first notice is the beauty of the ceiling. Curb appeal with automatic roof tiles.
How many of us have used a tiled home or business as a navigation point? “Just cross the beautiful red tiled house.” And while this aesthetic quality doesn’t immediately save money in your pockets, you can see a return on your investment if you ever have to move or sell your property. Any real estate broker will tell you that tiled properties hold their value better than any other type of roofed property.
Does the rest of the world know all the qualities of ceiling tiles? They probably know most of them. The company I work for now also has companies in England and Scotland. A few weeks ago I had the opportunity to speak with two gentlemen from the UK who are here, in Texas, about business.
For cracks, loose tiles and water damage. If the underlying tile is unstable, the tiles you place over it will warp, crack, or fall off the wall over time. A common problem faced by wall tile installers is the tile shifting downward under the force of gravity before the adhesive is applied. This is usually caused by the adhesive not being mixed properly. Follow the manufacturer’s instructions closely to ensure proper mixing.
Surface preparation
- Clean the surface of the tile you are laying on.
- Buff the tile surface to help the new tile adhere to this surface. Use an 80 grit sandpaper to roughen the surface of the tile.
- Wipe and clean the surface to remove any sanding dust.
tile laying
- Find the exact center of the wall. To do this, use a tape measure to find the center of each side of the wall and draw a vertical line from the edge through the wall. At the intersection of this X and Y axis is your center mark.
- At the base of the wall lay a row of loose tiles from the center mark to the end of one of the walls or installation area. Make sure to insert two commas in each tile so you get a proper layout. You probably won’t be able to put the last tile between the edge of the wall and the row of tiles. This is good; Leave this outside now.
- Measure the distance from the last complete tile to the edge of the wall or installation area. Note this distance later.
- Lay another row of loose tiles from the middle of the wall in the opposite direction.
- Measure the distance from the last complete tile to the edge of the wall or installation area.
- Move the vertical center line to divide the distance between these two measurements. For example, if the distance on the left side is 8 inches and the distance on the right side is 4 inches, move the line 2 inches to the left so that there are 6 inches on each side.
- Repeat this process for the horizontal center line. However, since you are installing the wall tiles, you will not be able to lay them on the floor as you did with the vertical center line.
- Place a tile at the center mark and hold it with your hand.
- Tile spacer above the tile and make a mark above the tile spacer.
- Place the bottom of the tile at this mark and repeat the process. Place the tile spacer and make a mark.
- Measure the distance from the last complete tile to the top of the wall. Define this space for later use.
- Repeat the same process toward the bottom of the wall from the center mark.
- Divide the difference between the two measurements and adjust the center line as necessary. The intersection between these two modified lines is your tile center mark. This divides the wall into four quarters. You will divide these quadrants one by one that originate from the center mark.
wall filler
- Mix the grout according to the manufacturer’s instructions.
- Scoop out a cup-sized portion of plaster with the lined plaster float.
- Start grouting at the corner of the room that will allow you to work toward the door. This will prevent you from getting trapped in the room and having to walk over plaster.
- Spread the grout in a diagonal direction of the joint. Keep the float at a 30 degree angle and be careful of gaps in your coverage.
- Use a damp sponge to scrub off excess grout in a diagonal direction of the joint. It doesn’t matter which diagonal direction you’re cleaning the grout, just don’t run the sponge directly under the grout joints just yet. Rinse the sponge often, making sure that any grout on the tile surface is removed sufficiently.
- Wipe the grout sponge along the joints to grout and form the grout inside the joint.
- Allow the grout to dry according to the manufacturer’s specifications.
Let’s say you’ve primed the wall surfaces in your bathroom in preparation for your tiles and you’ve meticulously planned the layout so that you don’t end up with narrow strips of tiles in places that could be bothersome to the eye.
If you haven’t done so already, you can read the first two articles in this series that will help you do just that: “Achieve perfectly tiled walls by properly equipping your surface” and “Determining the design for your bathroom wall tiles”.
So your wall surfaces are ready for tiling and you carefully mark the horizontal and vertical starting lines on each wall and wall section. These two steps are important to getting it right if you want your ceramic tiles to have a professional and long-lasting look, so don’t rush into it.
You are now ready to begin installing the tiles on the lower half of the wall
The process is basically the same whether you’re using porcelain tiles, ceramic wall tiles, or any type of natural stone tile. What will differ are the types of tools and adhesives you may need, and in the case of natural stone tiles, any sealant coating they may need.
In the case of most natural stones (particularly limestone tiles), seal the tiles before installing them to prevent adhesives and grease from your hands from setting the surface.
Spread the adhesive over a small area – the size you can cover with tiles before the adhesive begins to dry. This may be a case of trial and error for the first few tiles but you will soon get stuck in it.
Place the first tile just below the horizontal layout line and to one side of the vertical layout line
On the largest section of the wall space in your room. Then continue with the entire tiling on the floor and then on the side to the corner of the room from other boundaries such as bathroom, hallway, etc. If you find tiles slip too much, it could be the wrong adhesive condition for the type of wall tile you chose or the type of substrate the tile was installed on.
The adsorption of the substrate will affect how quickly and easily you can install the tiles in place.
For example, tiling on a painted surface will take longer for adhesive to hold the tile in place than tiling on a more absorbent surface such as grout. Using too much adhesive can also cause the tiles to slip, so check the recommended amount before you get started.
In order to achieve a professional finish, be sure to use tile spacers for equal spacing between each tile and also use a spirit level to check for horizontal and vertical lines at regular intervals.
When you finish the bottom half of the bathroom, the top half is generally easier to do because you now have a consistent horizontal line across the room. Continue tiling up and across the same way as you did for the bottom half of the room.
Once all the tiles are completely placed on a wall or wall section, you need to start cutting tiles to fill the remaining gaps between the entire tiles and the floor, ceiling, entryway or plumbing fixtures.
Getting a good, clean cut is probably the hardest part of tiling. If you are installing ceramic tiles, it is possible to score and break them along the score line, but if you have chosen porcelain wall tiles, you will need a high-quality electric tile cutter. You may need a professional cutter for thicker porcelain tiles, but they can be hired if necessary. Natural stone such as limestone or marble should be cut with a wet cutter to prevent chipping of the edges.
There are several steps to getting the perfect professional finish for your wall tiling project
- Prepare the surface, mark the design, use the appropriate adhesive, use tile spacers, and regularly check the level of horizontal and vertical lines as you work. But even if you do all of these things correctly, you can ruin the end result if the tiles are cut poorly.
- Full tiling is relatively easy – it’s easy for a room to look almost finished too quickly but it’s the precision of the finishing where ceiling and floor meet walls and around doorways, windows, units and plumbing fixtures that will reveal just how professional your tiling really looks.
- So, if you aspire to be a truly qualified brick craft, you need to make the cuts right. While many of the cut edges may be hidden under sinks, units, etc., the majority will be displayed at wall corners and wall intersections with the floor and ceiling. Especially in places like bathrooms, many awkward cuts will be required to finish tiling around sinks, toilets, and other plumbing fixtures.
- Selecting the right tools is an important first step, but, of course, the tools you use to cut the tiles will depend on the type of tiling you’re installing.
- More and more wall tiles are now porcelain rather than ceramic, so the relatively simple method of scoring ceramic tiles and breaking them along the score line cannot be used with porcelain tiles because they are too difficult.
Natural stone tiles prices are becoming more and more affordable and more and more people are choosing them in their bathrooms and kitchens, but again they are hard to score and break.
So you are sure that you need an electric tile cutter but the question is – which type? There are angle grinders, wet grinders, and diamond cutters, so for the non-professional, the decision on what type of cutter to buy or rent is vital if you don’t
- It can be a case of trial and error depending on the specific type of wall tile you have, so it’s often better to rent a cutter than to buy one so you can try it out. If you can, try to get some advice from a professional tile store, tile store, or rental store on the most appropriate cutter for your tile.
- Now start measuring the area for each individual section of the tile directly above the floor or under the ceiling and in the corners of the room. These are the simplest sections to start with but don’t assume the space is the same between the last row or full column of squares and the edge because rooms are rarely ‘square’.
- Measure and mark each tile on the back with the cutting line with a pencil – do not use a felt-tip pen as this may discolor the grout once applied.
- Continue to measure, mark, and cut all tiles that are roughly square or rectangular in shape, keeping in mind that some shapes may be “skewed” if the walls, floor, or ceiling are crooked. Don’t forget to check that any pattern on the tiles is the correct way before marking the cut line.
- Many people choose to use angle grinders for certain types of natural stone although it largely depends on how hard the tile is already (some limestone, for example, is very soft but others are very hard).
- Often the best option is a good electric tile cutter, but even with a good quality machine, the finished edge can be damaged when you reach the end of the cut. If this happens, try cutting off part of one edge of the tile and then starting at the other end and finishing near the middle.
Starting to pop in place, the picture will initially look more finished with only the finished single blinds left to cut and install. These are the hardest working hard in each episode. Use the triangle in the triangle in the cut-out area of the desired shape. This will prevent serious damage to the visible surface.
Professional finish created. Ceramic Tile Porcelain tile is very hard and will require an interior cutter like natural stone tile.